Convert Ps3 Game Iso To Pkg Repack ((full)) Instant
From ISO to PKG: A Guide to Converting and Repacking PS3 Games
The PlayStation 3 hacking scene has evolved significantly over the years. While early custom firmware (CFW) users relied heavily on folder formats (JB) or ISO images stored on an external hard drive, the modern standard for convenience and performance is the PKG repack. This guide explains what this conversion entails, why you might want to do it, and the general process involved.
Step 3: Create a "Repack" Project
- Launch
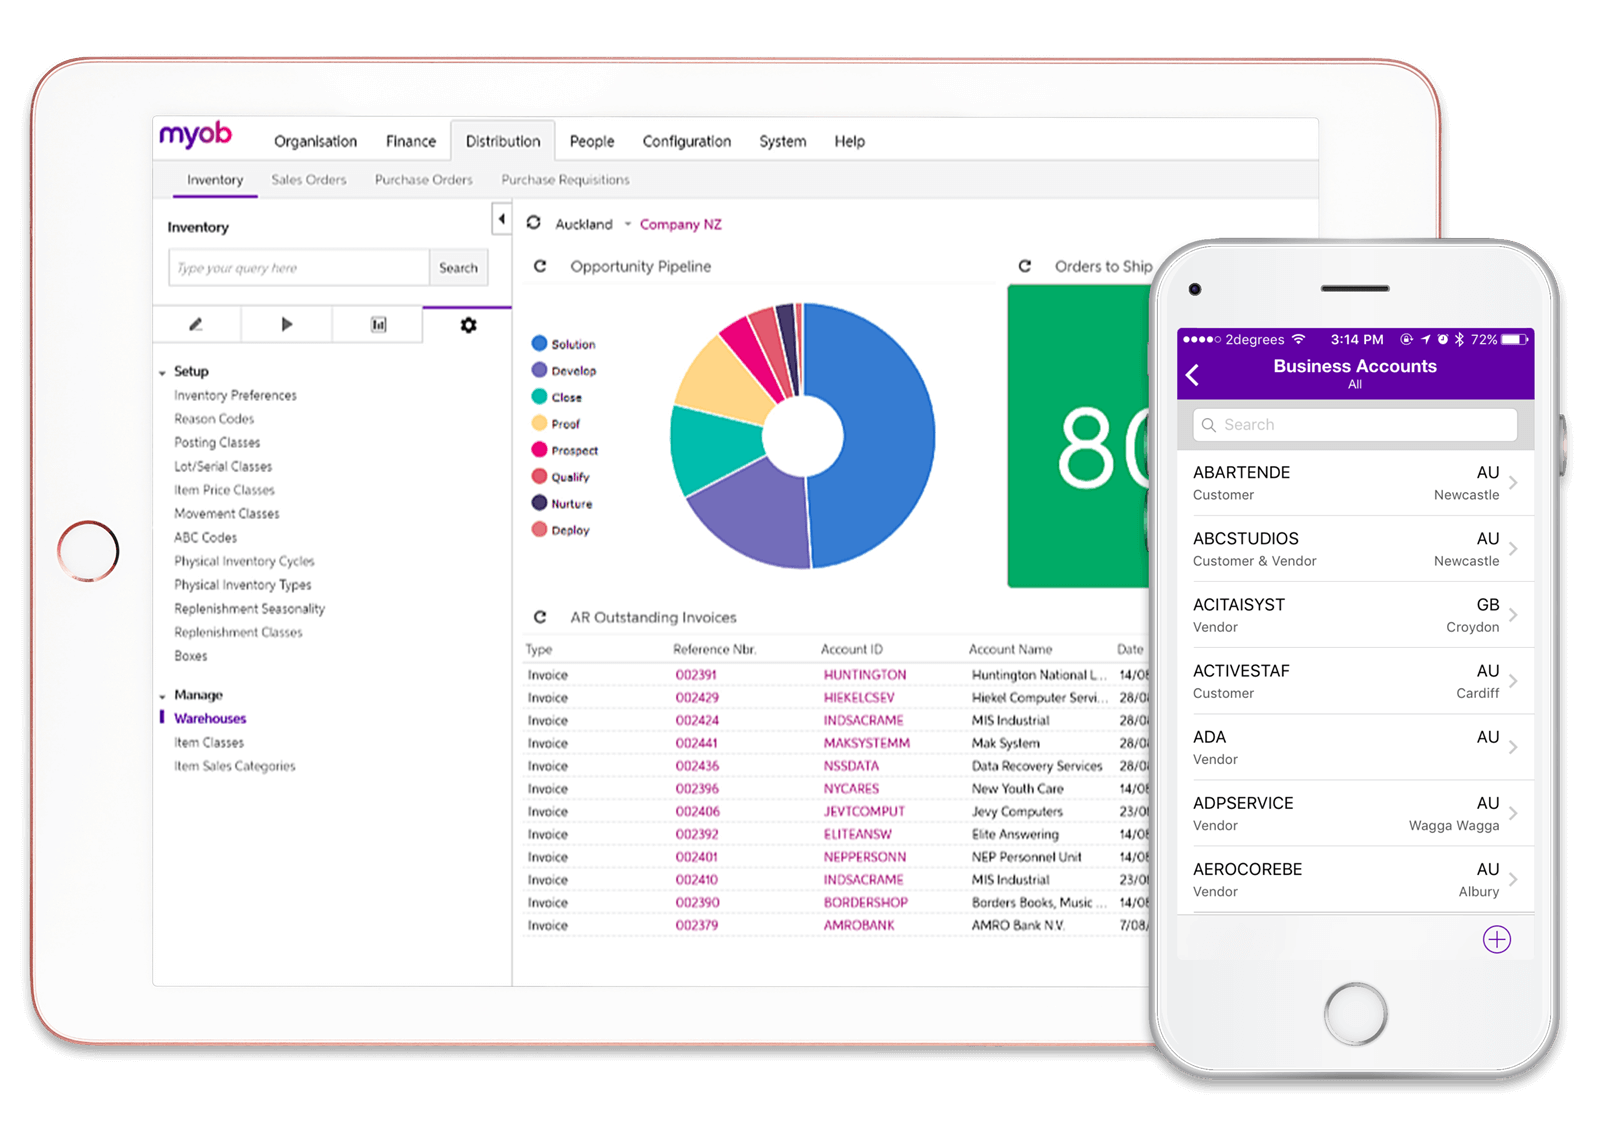
TrueAncestor PKG Repacker.
- Point it to your extracted game folder.
- Set the Type to "HG" (Harddisk Game).
- Assign a Title ID (e.g., BLUS12345) – this must match the original game ID.
- Optionally, edit the
PARAM.SFO to change the game name shown on the XMB.
Option 1: The "How-To" Tutorial (Best for Forums or Reddit)
Title: [Guide] How to Convert PS3 ISO Games to PKG (Folder Structure & Repacking)
Are you tired of managing massive ISO files or trying to get your games to load faster on your CFW PS3? Converting your ISOs to PKG format is a great way to streamline your library and install games directly to the XMB.
Here is the step-by-step process to repack your ISOs into installable PKG files.
Prerequisites:
- A PS3 ISO file.
- PS3 ISO Patcher (to convert ISO to folder structure).
- PS3GameConvert (to prepare the files).
- PS3 PKG Maker (or standard TrueAncestor tools).
- A PC running Windows.
Step 1: Extract the ISO
You cannot go straight from ISO to PKG efficiently without extracting the contents first.
- Open PS3 ISO Patcher.
- Select your ISO file.
- Choose "Extract" or "Convert to Folder."
- Note: You will need the disc key (PIC layer) if the ISO is encrypted, but most tools handle standard ISOs automatically.
Step 2: Prepare the Game Files
Once extracted, you will have a folder (usually named BLESXXXXX or BLUSXXXXX).
- Open PS3GameConvert.
- Drag the extracted game folder into the tool.
- The tool will patch the
EBOOT.BIN and PARAM.SFO to make the game playable as a package file rather than a disc-based game.
- It will output a new folder, typically named
NPUBXXXXX or NPEBXXXXX.
Step 3: Create the PKG
Now that the game logic is switched from "Disc" to "HDD," we pack it up.
- Open TrueAncestor PKG Repacker or PS3 PKG Maker.
- Select the option "Create PKG from Folder."
- Point the tool to the
NPUB/NPEB folder created in Step 2.
- Select an output location and hit Build.
Step 4: Installation
- Transfer the resulting
.pkg file to the root of a FAT32 formatted USB drive.
- Plug the USB into your PS3.
- Navigate to Install Package Files on the XMB.
- Select your PKG and install.
Troubleshooting Tip: If the game crashes on boot, you may need to manually resign the EBOOT.BIN using a tool like Resigner before packing the PKG. This is common for games that originally required higher firmware versions.
Alternatives to Full Repacking
If the above seems too complex, consider:
- ISO + webMAN MOD: Mounts ISOs directly from XMB with a simple press of a button (almost as good as PKG).
- PSN Liberator: A tool that converts retail PKGs (not ISOs) to work on CFW.
- Folder Format + prepNTFS: Running games from an NTFS drive as "folder" format is often simpler than repacking.
Option 2: The Social Media Snippet (Best for Twitter/X or Discord)
🛠️ Tired of mounting ISOs? Convert your PS3 library to PKG! 🎮
Why deal with webMAN cache or slow loading times when you can install games directly to the XMB? Here is the fastest workflow to repack your ISOs:
1️⃣ Extract: Use PS3 ISO Patcher to convert the ISO into a standard PS3 Game Folder.
2️⃣ Convert: Drag the folder into PS3GameConvert to patch the EBOOT/SFO from Disc mode
Converting PS3 ISOs to PKG (Repack) is a specialized process used primarily by users who want their games to appear directly on the XMB (Cross Media Bar) without needing a manager like webMAN MOD
to mount them. However, this method is often considered a "downgrade" by the homebrew community due to its complexity and potential for errors. Review: ISO to PKG Repack Conversion Ease of Use
Requires multiple PC tools, resigners, and often manual patching. Compatibility
Not all ISO/folder games can be converted; some fail to launch after conversion. XMB Integration
Success results in games appearing natively on the XMB for a "retail" feel. Performance
Generally identical to ISO, though some users report fewer "hiccups" with ISO. Key Pros & Cons
Converting PS3 Game ISO to PKG Repack: A Step-by-Step Guide
Are you a PS3 gamer looking to repack your favorite game from an ISO file to a PKG file? Look no further! In this blog post, we'll walk you through the process of converting a PS3 game ISO to a PKG repack.
What You'll Need
Before we begin, make sure you have the following:
- A PS3 game ISO file
- A computer with a compatible operating system (Windows, macOS, or Linux)
- A few software tools (listed below)
Software Required
To convert the ISO file to a PKG repack, you'll need to download and install the following software:
- PS3 ISO to PKG Converter: A simple tool that converts ISO files to PKG files. You can download it from [insert download link].
- PKG Repack Tool: A tool that allows you to repack PKG files. You can download it from [insert download link].
- 7-Zip: A file archiver that can extract and compress files. You can download it from [insert download link].
Step 1: Extract the ISO File
Using 7-Zip, extract the contents of the ISO file to a folder on your computer. This will give you access to the game's files.
Step 2: Convert ISO to PKG
Open the PS3 ISO to PKG Converter tool and select the extracted ISO folder as the input. Choose a destination folder for the PKG file and select the "Convert" button. The tool will create a PKG file from the ISO files.
Step 3: Repack the PKG File
Using the PKG Repack Tool, open the PKG file you just created. Select the "Repack" option and choose a destination folder for the repacked PKG file.
Step 4: Configure the Repack Settings
In the repack settings, you'll need to configure the following:
- Title ID: Enter the title ID of the game (you can find this information online).
- Game Name: Enter the name of the game.
- PKG Name: Choose a name for the repacked PKG file.
Step 5: Repack the PKG File
Once you've configured the repack settings, select the "Repack" button to create the final repacked PKG file.
Step 6: Install the PKG File on Your PS3
Transfer the repacked PKG file to your PS3 using a USB drive or FTP. Install the PKG file on your PS3 and enjoy your game!
Tips and Precautions
- Make sure to use compatible software and follow the instructions carefully to avoid any errors.
- Always verify the integrity of the PKG file before installing it on your PS3.
- Be aware that converting and repacking PS3 games may void your warranty or violate Sony's terms of service.
Conclusion
Converting a PS3 game ISO to a PKG repack is a straightforward process that requires a few software tools and some basic knowledge. By following this guide, you should be able to successfully repack your PS3 game from an ISO file to a PKG file. Happy gaming!
The hum of the PC fan was the only sound in the room as Leo stared at the file: Metal_Gear_Solid_4.iso
. It was a relic of the physical era, a massive 30GB image file sitting on his hard drive. His PS3, however, was a different beast now—running custom firmware with a failing Blu-ray drive. To play this masterpiece without the disc spinning like a jet engine, he needed to perform the ultimate digital alchemy: converting an ISO to a PKG repack Chapter 1: The Extraction Leo opened his toolkit. First, he fired up PS3 ISO Tools
. With a few clicks, he "exploded" the ISO. The single, monolithic file shattered into a structured folder hierarchy: , and the all-important
. This was the game’s DNA, and to make it a digital install, he had to rewrite its genetic code. Chapter 2: The Patching convert ps3 game iso to pkg repack
Digital games on the PS3 behave differently than discs. Leo opened the editor. He switched the Category from "DG" (Disc Game) to "HG" (Hard Drive Game)
. This told the console, "Don't look for a laser; look for the internal HDD." Next came the
. This was the heart of the game’s executable. Using a "Resigner" tool, he decrypted the disc-based boot file and resigned it as a
(Network PlayStation Digital Rights Management) file. Without this, the PS3 would throw the dreaded error—the digital equivalent of a "Keep Out" sign. Chapter 3: The Packing With the files prepped, Leo moved to the PS3_PKGI_Tool
. He dragged the modified folder into the workspace. He added a custom —a high-def image of Solid Snake—and a
for the background wallpaper so the game would look professional on the XMB dashboard.
He clicked "Build." The progress bar crawled. The computer was busy wrapping thousands of files into a single, encrypted container. Chapter 4: The Installation An hour later, the file was ready. Leo transferred the MGS4_Repack.pkg
to a FAT32-formatted USB drive. He plugged it into the right-most port of his PS3 and navigated to Package Manager
He hit "Install." The PS3’s amber light flickered frantically as it unpacked the data. When the progress reached 100%, the disc icon was gone. In its place sat a clean, digital tile on the XMB. Chapter 5: The Boot Leo held his breath and pressed
. The screen went black. For a second, he feared a soft-brick or a crash. Then, the iconic "Konami" logo faded in, followed by the silent, smooth transition to the main menu. No grinding gears, no laser clicking—just the game running purely from the silicon. The repack was a success. step-by-step technical guide on which specific tools to use for your own conversion?
In the flickering neon of the digital underground, there lived a "Ghost Archivist" named Kael. He didn't deal in money; he dealt in preservation.
The year was 2024, and the great "Digital Sunset" was approaching. The servers for the legendary PlayStation 3 were cold and silent, leaving thousands of worlds—kingdoms of high fantasy and gritty urban sprawls—trapped inside the "Frozen ISOs." These were the raw, monolithic disc images, heavy and unyielding, like stone tablets that no modern machine could read without a struggle. Kael’s mission was the Great Conversion.
He sat before his rig, the fans whirring like a heartbeat. On his left monitor sat a raw ISO—a lost masterpiece of a game that had been delisted from every store. It was a digital ghost, a file that existed but couldn't "live" on a standard console without the heavy chains of a disc drive. "Time to set you free," Kael whispered.
He initiated the Extraction. Using ancient scripts, he cracked the ISO open, spilling out its guts—the textures, the code, the music. It was like performing surgery on a dream. He stripped away the regional locks and the bloated dummy data that served no purpose in the new age.
Then came the Rebuilding. He didn't just want a file; he wanted a PKG Repack. This was the holy grail—a format that the console would recognize as a "native" citizen, something that could be installed directly into the heart of the system’s memory, bypassing the need for physical media forever.
As the progress bar crawled, Kael had to navigate the "Digital Thorns"—the encryption keys. He meticulously signed each file with a "Fake License," a clever bit of trickery that told the console, “I belong here. I am home.”
The final step was the Repack. He compressed the chaos back into a single, elegant PKG file. It was smaller, faster, and more resilient than the ISO ever was.
When the bar hit 100%, Kael transferred the file to an old, dusty console. He clicked 'Install.' A few minutes later, a new icon appeared on the dashboard, glowing with life. He pressed 'Start.' The music swelled, the logo flashed, and a world that was supposed to be forgotten surged back into existence.
Kael leaned back, the blue light of the screen reflecting in his tired eyes. The ISO was a memory, but the PKG was a legacy. The game wasn't just saved; it was reborn.
Converting a PS3 game from an ISO to a PKG (repack) format is often done to make disc-based games appear directly on the XMB (XrossMediaBar) like digital PSN titles. While many users prefer the ISO format
for its higher compatibility and ease of use with tools like webMAN MOD
, creating a PKG repack can offer a more "official" aesthetic for your library. Prerequisites & Tools Before starting, ensure you have these tools on your PC: PS3 ISO Tools : To extract the contents of your ISO file. PS3xploit Resigner (or similar PKG builders): To sign the files for use on Aldostools PS3 Tools Collection From ISO to PKG: A Guide to Converting
: Includes various utilities for managing SFO files and PKG creation. Step-by-Step Conversion Process
Converting a PS3 ISO to a PKG (repack) allows you to install disc-based games directly to your XMB (main menu) like digital PSN titles . This is popular for
users or those who want an organized library without using launchers like webMAN MOD Recommended Tools PS3 ISO TOOLS
: Extracts the contents of your ISO file into a "Folder" format. CFW2OFW Helper
: The standard tool for converting folder-format games into a format compatible with PKG creation. TrueAncestor PKG Repacker
: The final tool used to "repack" the converted folders into an installable Step-by-Step Conversion Process Extract the ISO PS3 ISO TOOLS to extract your game ISO into a folder. You should see a folder and a PS3_DISC.SFB Prepare for PKG Drag your extracted game folder onto the CFW2OFW Helper executable.
The tool will automatically check for game updates and create two new folders (typically named with the game's Title ID, like Repack to PKG Move these two generated folders into the folder within your TrueAncestor PKG Repacker directory.
Run the repacker, select "Fast Pack," and choose your game folder to generate the final Install on PS3 Transfer the file to a FAT32 USB drive or use FTP. On your PS3, use the Package Manager (under the Game column) to install the file. Important Considerations
Converting a PlayStation 3 game from an ISO format to an installable PKG (package) file—often called a "repack"—is a popular way to make games appear directly on your XMB (main menu) without needing a backup manager like multiMAN or IRISMAN to mount them first.
While ISO is often considered the superior format for compatibility and performance, repacking into a PKG provides a "PSN-like" experience that many users find more organized. Here is a comprehensive guide on how to perform this conversion. Essential Tools for Conversion Before you begin, you will need a few specialized PC tools: PS3 ISO Tools: To extract the contents of your ISO file.
PS3 CFW Tools / PS3 Tools Collection: A suite of utilities used to resign files and build the final package.
CFW to OFW Helper: Often used in these "repack" workflows to automate the conversion of disc-based files into a format compatible with PKG installation.
A Resigner Tool: Necessary for signing the final PKG and license files so they can run on your specific PS3 (especially important for HEN users). Step-by-Step Conversion Process 1. Extract the ISO Contents
You cannot convert an ISO directly to a PKG in one step. First, use PS3 ISO Tools to extract the ISO into a standard folder format (often called "JB folder" format). 2. Prepare the Files for Repacking
Locate the extracted folder and look for the PS3_GAME directory.
Check the param.sfo file using an editor to identify the Title ID (e.g., BLUS12345). This ID is crucial for the repacking process.
Move the contents into a dedicated workspace folder, typically named something like CFW to OFW depending on the helper tool you are using. 3. Run the Conversion Helper
Drag your game folder onto the CFW to OFW Helper executable.
The tool will process the files and usually generate two main folders: full game and game update.
This step modifies the game's executable (EBOOT.BIN) and other files to allow them to run from the hard drive as an installed app rather than a mounted disc. 4. Build the PKG Repack Move the processed folders into a "Make Backup PKG" folder.
Run the associated batch file (often named do.bat) to begin the repacking process. The tool will output three critical files: The Game PKG: The main game data. The Patch/Update PKG: Any necessary updates.
The License PKG: This contains the RIF/RAP information needed to boot the game. 5. Signing and Installation Launch TrueAncestor PKG Repacker
If you are using PS3 HEN, you must use a Resigner tool on these PKG files before moving them to your PS3. Once signed: Copy the PKG files to a FAT32-formatted USB drive. Plug the drive into the right-most USB port of your PS3.
Go to Package Manager > Install Package Files and install them in order (Game, then Patch, then License). Pros and Cons of PKG Repacks
1. "80010006" or "80010017" After Install
- Cause: The EBOOT was not properly patched for disc-less boot.
- Fix: Re-extract a clean EBOOT from the ISO and repatch with TrueAncestor’s disc-less mode. Also verify that
PARAM.SFO’s category is HG not DG.